
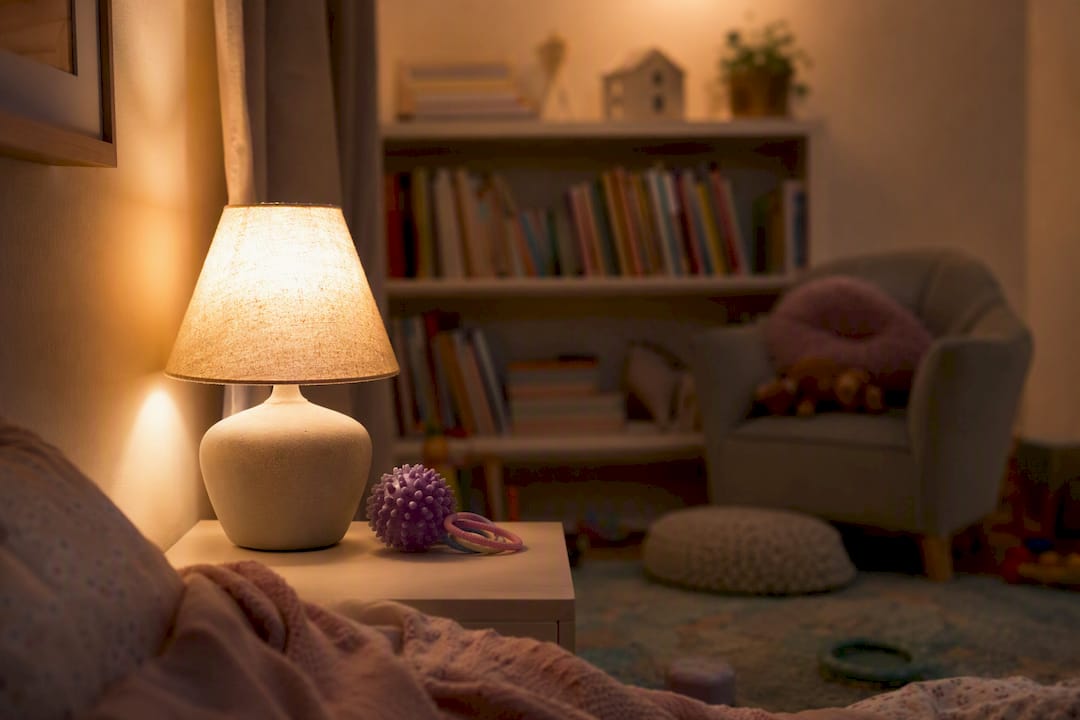
Swap the big overhead light for a warm, dimmable lamp and watch what happens in the next few minutes. That single change is the one most parents notice first, and it’s usually the cheapest.
Three moves you can make this afternoon:
- Swap one harsh bulb for a warm LED (look for 2700K or lower on the box).
- Add a lamp with a fabric or frosted shade to a room your child uses most.
- Fit a plug-in dimmer to that lamp so you can adjust brightness without rewiring anything.
Two safety notes before you start: check the bulb is marked “dimmable” if you’re using a dimmer (non-dimmable bulbs can buzz, flicker or fail early), and never touch mains wiring or ceiling fittings yourself. Get a qualified electrician for anything hardwired.
Key Takeaways
Sensory friendly lighting works best when parents remove harsh overhead light first, then test warm, dimmable, low-flicker alternatives one change at a time.
| Point | Details |
|---|---|
| Start with the biggest source | Swap or dim the main overhead light before buying anything else. |
| Aim for 2200K to 3000K | Warm colour temperature in this range is linked to calmer behaviour and is NHS-recommended. |
| Check CRI and flicker | Look for CRI 80 or above and low-flicker or PWM-free claims on packaging. |
| Test one variable at a time | Trial each change for 10 to 30 minutes and log your child’s reaction before deciding. |
| Try a pre-tested space | Fidget and Spin’s sensory sessions and SEN party packages already use warm, dimmable, sensory-aware lighting across Brighton, Hove and Sussex. |
This article is general information, not a substitute for advice from a qualified doctor. Consult a qualified healthcare professional about your own circumstances before acting on anything here.
Table of Contents
- Sensory friendly lighting checklist: what to change first
- How do you know lighting is the problem?
- What bulbs and fixtures actually work for sensory needs
- Dimmers, smart bulbs and the flicker problem
- What research says about colour and behaviour
- Room-by-room lighting fixes that actually help
- How to trial lighting changes with your child
- Sensory friendly lighting: what to check before you buy
- The party we nearly cancelled
- A parent’s honest perspective on getting this right
- Try a space we’ve already sensory-tested
- Sources
- FAQ
Sensory friendly lighting checklist: what to change first
Start cheap, go bigger only if you need to. Here’s the order I’d tackle it in.
- Warm LED bulb swap (very low cost, very low effort) — test the same evening.
- Lamp with a diffuser or fabric shade (low cost) — test over a day or two.
- Plug-in dimmer switch (low cost) — test across a few different activities.
- Blackout blinds or curtains (medium cost) — test over a week, especially for sleep.
- Low-flicker bulb replacement throughout the house (medium cost) — test room by room.
- Electrician-fitted dimmer or new ceiling fixture (higher cost) — only once you know warm, dimmable light actually helps.
Don’t skip straight to number six. I’ve met parents who spent hundreds on a smart lighting system before working out their son couldn’t stand the blue tinge it defaulted to.
How do you know lighting is the problem?
Squinting is the obvious one. But it’s rarely the only sign, and it’s often not the first.
Watch for eye rubbing, sudden covering of the face, refusing to enter a room, or a spike in stimming the moment you walk under a fluorescent strip. I’ve seen my own son leave a birthday party within four minutes flat, not because of the noise, but because the hall lights had that flat, buzzing whiteness that makes his whole body go rigid.
Some patterns worth logging:
- Covering eyes or looking down specifically in rooms with strip lighting or big ceiling fixtures.
- Meltdowns that start at mealtimes under bright kitchen lights but ease in the living room.
- Agitation that appears the moment you walk into a supermarket or soft play, then lifts once you leave.
Lighting rarely acts alone. Noise, crowding and unfamiliar smells often pile on at the same time, which is exactly why the trial and test method later in this guide matters. You need to isolate the variable, not guess at it.
What bulbs and fixtures actually work for sensory needs
Forget the marketing copy on the box. Three numbers matter, and none of them are complicated once you know what they mean.
Colour temperature (K) tells you how warm or cool a bulb looks. Anything from 2200K to 3000K gives you that golden, low-arousal glow, similar to candlelight or a sunset. NHS guidance on autism and everyday life specifically recommends this range, alongside dimmer switches and swapping harsh overhead “big lights” for smaller, indirect sources like lamps and wall lights. Anything above 4000K starts tipping into that office-strip-light whiteness that so many autistic people describe as physically uncomfortable rather than just unpleasant.
CRI (Colour Rendering Index) measures how accurately a light source shows true colours. Aim for CRI 80 or above. Low-CRI bulbs make skin tones and food look slightly wrong, which sounds trivial until you remember how many neurodivergent children already struggle with food textures and appearances.
Flicker is the one most parents miss entirely, because human eyes often can’t consciously detect it. Cheap LEDs, especially dimmable ones paired with the wrong dimmer, can pulse dozens of times a second. NDTi’s guidance on sensory-friendly LED lighting warns that some LEDs are just as disruptive as fluorescent tubes for people with light sensitivity, which surprises most people who assume LED automatically means better.
Pro Tip: Hold your phone camera up to a bulb and film in slow motion. If you see visible banding or flickering on screen, that bulb is likely flickering in real life too, even though your eyes can’t consciously register it.
On fixtures: favour lamps over anything mounted flush to the ceiling, and look for pelmet lighting, recessed indirect fittings, or simple diffuser shades over any exposed bulb. Before buying, check the packaging or product listing for:
- A stated colour temperature between 2200K and 3000K.
- CRI ≥ 80 (sometimes written as Ra80 in the small print).
- Dimmable compatibility, and whether it’s rated for trailing-edge or leading-edge dimmers.
- Any mention of “low flicker” or “flicker-free” claims, ideally with a stated flicker percentage.
Dimmers, smart bulbs and the flicker problem
Anthony fitted our first dimmer wrong. Bought a leading-edge dimmer for trailing-edge LED bulbs, and the whole lamp hummed like a fridge. Cheap mistake, easily avoided if you check the packaging first, or just ask an electrician to match dimmer to bulb type when they’re already in doing the work.
Leading-edge dimmers were designed for old-style halogen bulbs. Trailing-edge dimmers tend to suit modern dimmable LEDs better and usually give a smoother, quieter dim. Get this wrong and you get buzzing, flickering, or bulbs that die within weeks. If you’re touching anything mains-wired, bring in a qualified electrician rather than guessing.
Smart bulbs can be brilliant for building predictable routines. Set a lamp to dim automatically at 6pm before bath and bed, and you’ve removed one daily transition that used to involve a fight over the light switch. Their limits are real, though: budget smart bulbs sometimes flicker at low brightness, and Wi-Fi latency can mean a half-second delay between tapping the app and the light responding, which some children find unsettling in itself.
Pro Tip: Test any new bulb on its lowest dim setting for at least a minute before buying more. Some LEDs flicker only when dimmed right down, which is exactly the setting you’ll use most in a calm-down space.
A quick safety note: LEDs run cooler than old halogens, but cheap unbranded ones can still overheat in enclosed fittings. Stick to fittings with proper ventilation and CE or UKCA-marked products, and get an electrician for anything beyond a plug-in lamp.
What research says about colour and behaviour
I’ll be honest, I was sceptical of “the science of lighting” for years. Too many blog posts dressed up a guess as a fact. But a few studies have actually looked at this properly, and the pattern is consistent enough to be useful.
A 2025 study on light colour in autistic children at Hacettepe University found yellow light was linked to playful, positive behaviour in most observations. Harsh white light, by contrast, was often associated with task refusal, alongside increased aggression. That’s a striking gap for something as simple as swapping a bulb.
A separate 2025 study on light sensitivities and colour effects found green and blue tones often carried calming associations, while red and white more often triggered negative responses. The authors recommended modest, warm colour temperatures in educational settings rather than anything harsh or saturated.
Neither study means every autistic or ADHD child will react the same way. Individual variation is real, and it’s exactly why testing at home matters more than following a chart blindly.
Room-by-room lighting fixes that actually help
Bedroom. Blackout blinds or curtains stop streetlight glare and summer evening daylight from disrupting sleep. Layer a warm bedside lamp instead of a ceiling light, and build a predictable dimming routine each night, brighter at story time, dimmer by the time teeth are brushed.
Playroom. Use several low-level lamps rather than one bright source overhead. Tuck bulbs behind shades or diffusers so nothing is directly visible from typical sitting or lying positions. Colour-changing LED strips are fun as an occasional novelty, but they make a poor primary light source.
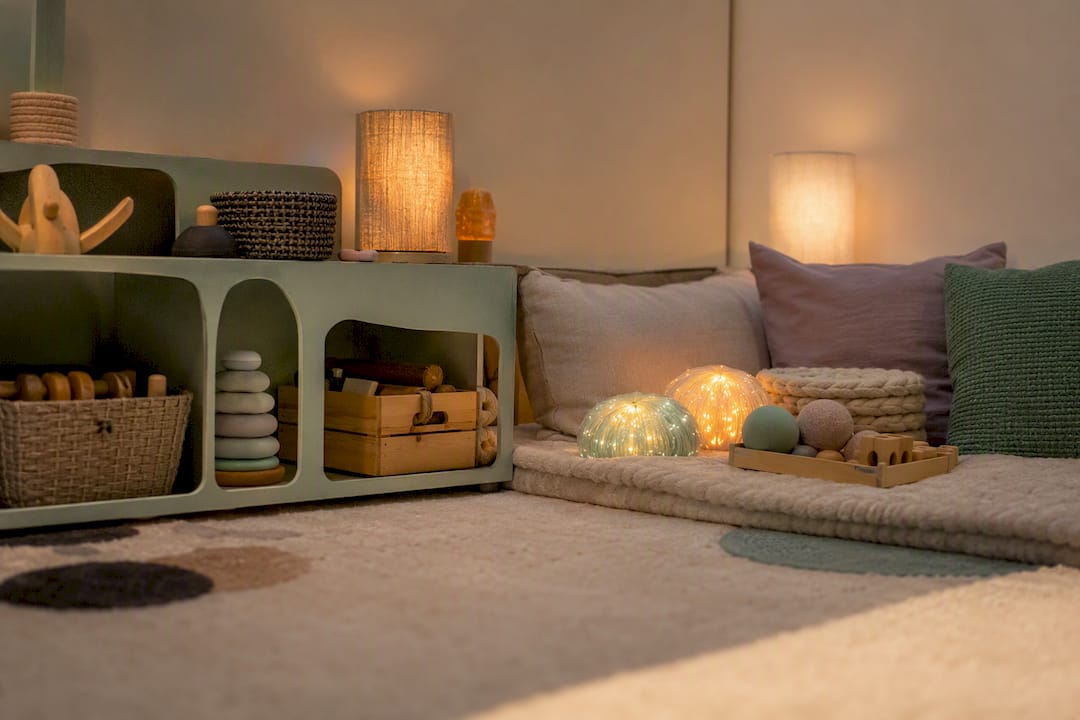
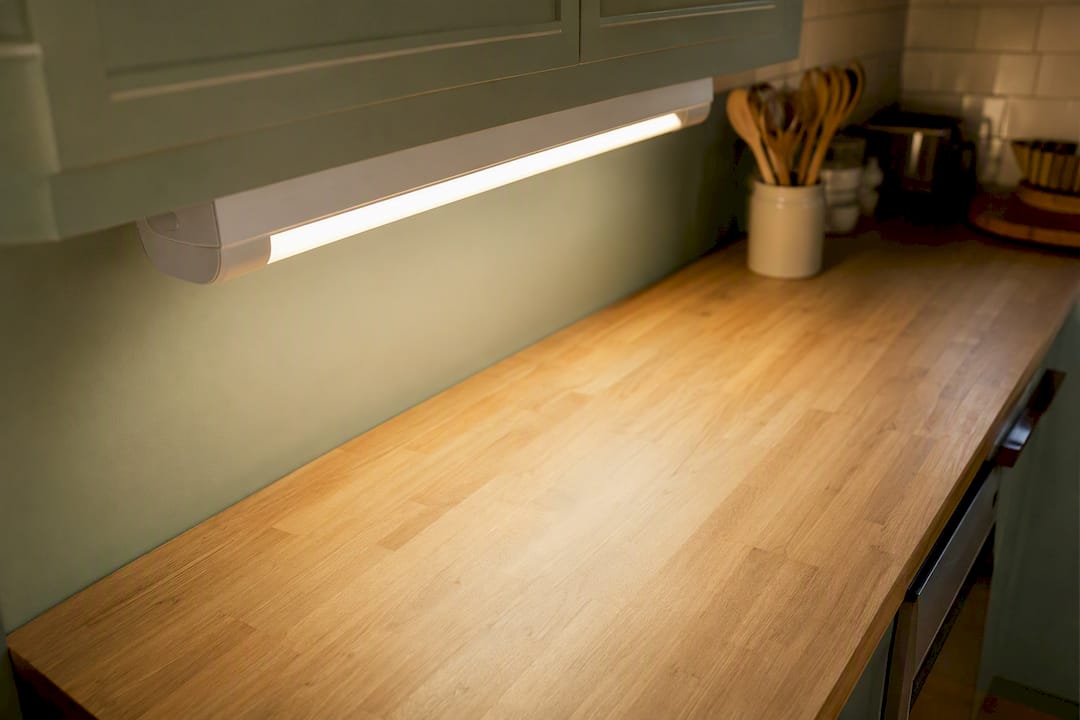
Kitchen. Task lighting over worktops with a diffuser beats an exposed fluorescent strip every time, especially above a dining table where a child is already managing food textures and family noise at once.
Living room. Mix daylight through sheer curtains with lamp light in the evening. Position seating away from window glare and reflective screens, and switch to warmer bulbs as the evening goes on.
Classroom or public spaces. You can’t rewire a school hall, but you can ask. Requesting a seat away from strip lighting, or a fixture swapped near a workstation, is a reasonable adjustment many SENCOs will already understand. Short-term fixes like a cap, tinted glasses, or a seat further from windows can bridge the gap while bigger changes get discussed. Our guide to adapting play for neurodivergent children covers more on requesting these small, reasonable tweaks.
How to trial lighting changes with your child
Guessing wastes money. Testing one thing at a time tells you what actually works.
- Pick one variable. Change only the bulb, or only the brightness, never both at once.
- Set a baseline. Note how your child behaves in the room as it currently is, over a normal activity like snack time or play.
- Introduce the change for 10 to 30 minutes. Swap the bulb or dim the light, then let your child use the room as normal.
- Observe and record. Note the time, activity, what changed, and the immediate reaction.
- Check again after 30 minutes. Some reactions build slowly rather than showing instantly.
A simple log works better than memory. Keep four columns: time, activity, what changed, and reaction. Nothing fancy, a phone note is fine.
If the reaction is clearly positive, keep the change. If it’s mixed, tweak one thing (try a slightly warmer bulb, or a lower dim level) and test again. If it’s negative, revert and try a different variable. Repeat trials across a few days and in different rooms; a one-off reaction isn’t proof either way. This mirrors how an IoT-based light sensitivity trial with 20 autistic children found child-led testing agreed with practitioner assessment 95% of the time, better than the system running alone. Your child’s own reaction is genuinely reliable data.
Sensory friendly lighting: what to check before you buy
Keep this list on your phone for the next trip to a lighting aisle or online basket:
- Colour temperature stated between 2200K and 3000K.
- CRI of 80 or higher (sometimes shown as Ra80).
- Marked as dimmable, with compatible dimmer type noted.
- Some indication of low flicker, ideally a stated flicker percentage.
Be wary of anything marketed as “sensory” or “party” lighting as a main room light. Coloured LED strips can be genuinely calming for some children and completely overstimulating for others. Treat them as a tested extra, not a default, until you’ve seen your own child’s reaction.
The party we nearly cancelled
Remy was four. We’d booked a soft play hall for his birthday, and I stood in the doorway watching the strip lights buzz along the ceiling, already knowing it was a mistake. He lasted six minutes before he was on the floor, hands over his ears, and we left through the fire exit so we didn’t have to walk past the other parents.
That was the moment Anthony and I started paying proper attention to lighting, not as an afterthought but as the first thing we’d check in any space. Small swaps first: a warm bulb, a lamp, a dimmer. Involve your child in testing, don’t just impose a choice and hope. Expect some changes to do nothing at all. That’s not failure, it’s information.
It’s part of why we built Fidget & Spin the way we did. Every session and party space we run has been trialled against exactly this kind of reaction, and you’ll find more of what we’ve learned in our sensory play best practices guide.
A parent’s honest perspective on getting this right
I used to think we needed the perfect setup before anything would work. Perfect bulbs, perfect dimmer, perfect blackout blinds fitted by someone who knew what they were doing. Some evenings that pressure alone was exhausting enough to make me not bother at all.
Here’s what I’d tell any parent starting this now: small changes genuinely help most children, most of the time, and they cost less than you think. But some children need far more tailoring than a bulb swap will ever give, and that’s not a sign you’ve failed, it’s just where your child sits on a very wide spectrum of sensory needs.
Try one thing. Watch. Adjust. Don’t chase a finished version of your home, chase a slightly better Tuesday than last Tuesday.
Try a space we’ve already sensory-tested
Fidget and Spin exists because we got tired of walking into halls, gyms and party venues that clearly weren’t designed with children like Remy in mind, then having to fix the lighting, the noise and the crowd ourselves on the day. Every session and party space we run has warm, dimmable lighting built in from the start, tested across three sensory zones rather than bolted on as an apology.
Our weekly sensory stay-and-play sessions across Brighton, Hove and wider Sussex give you a space to see how your child responds to properly considered lighting without any of the trial-and-error at home. If a birthday’s coming up, our SEN-friendly party packages run from The Wee One at £220 through to The Whole Shebang at £530, and every package includes the same sensory-aware approach to light and space. We also hold Pay-It-Forward concession spots for families who need them, funded by other parents at checkout. Book a session or check party dates whenever you’re ready.
Sources
- The impacts of light colour on autistic children (Hacettepe study)
- Study on light sensitivities and colour effects in autism (2025)
- IoT-LSAS: an IoT and computer vision system to assess light sensitivities in children with ASD (2024)
FAQ
What is sensory friendly lighting?
Sensory friendly lighting means warm-toned (2200K to 3000K), dimmable, low-flicker light from indirect sources like lamps rather than harsh overhead fixtures, designed to reduce visual overload for people with sensory processing differences.
What type of lighting is best for a child with autism?
Warm white LED bulbs between 2200K and 3000K, dimmable and low-flicker, used in lamps rather than exposed ceiling fittings, are the combination most consistently recommended by NHS guidance and practitioner advice.
What lighting is best for ADHD?
The same principles apply: warm, dimmable, low-flicker light reduces visual distraction and supports focus, though some children with ADHD respond well to slightly brighter task lighting during specific activities like homework.
What type of lights are best for sensory rooms?
Layered, low-level lighting from multiple sources, warm colour temperature, diffused or hidden bulbs, and dimmer controls work best, with any colour-changing or novelty lighting introduced only after testing a child’s individual response. Fidget and Spin’s sensory sessions use exactly this layered approach across all three play zones.
Recommended
- How to find and use sensory-friendly spaces in the UK | Fidget and Spin Brighton
- Sensory play best practices for neurodiverse children | Fidget and Spin Brighton
- Sensory integration strategies: a step-by-step guide | Fidget and Spin Brighton
- How to adapt play for neurodiverse children: a practical guide | Fidget and Spin Brighton